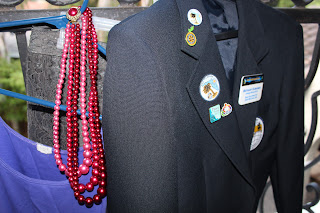
Students exchange pins and gradually over their year abroad they acquire enough to have a well adorned blazer. While the pin covered blazers do not always look classy and put together, they are a representation of a year abroad and are often memory-filled. Some students order their pins, some design theirs online, and others (like me) make them.
These are the pins I made today.
Here is a step-by-step picture guide to how to make simple pins like the ones I made.
Supplies:
Ribbon (Hobby Lobby often runs their ribbon at 50% off so watch for sales)
Pin backs (I found mine at Hobby Lobby at 36 for $3)
Center adornment-optional (I chose to use a variety of USA coins)
*note* Always check online for coupons before going to hobby lobby. They often have good ones that make purchasing supplies a little cheaper.
Also:
Hot glue
Scissors
Step 1: Cut ribbon. I chose to cut mine anywhere from 6-8 inches
Step 2: Cross the ends of the ribbon over each other to create a loop. Use a dot of hot glue where the ribbon crosses itself to hold the pieces together.
Step 3 (optional):
Attach a center piece ontop of the ribbon. I used various US coins. To attach the coins you apply hot glue liberally onto of the point in which the ribbon ends cross and firmly press the coin onto the hot glue.
Step 4:
Attach pin backs onto ribbons with a line of hot glue.
Let dry and they are done!


No comments:
Post a Comment